Aptana Studio
Aptana Studio is an IDE - integrated development environment - based on the Eclipse framework. It provides powerful tools for exploring, understanding, and refactoring your code.
Because Aptana Studio is Eclipse + a plugin, in class I may refer to “Aptana” and “Eclipse” interchangeably. Unless explicitly noted, both terms refer to the combination of Eclipse framework + Aptana Studio plugin.
Aptana’s Python support was formerly a separate Eclipse plugin called PyDev. PyDev was purchased by Aptana and folded into Aptana Studio. Aptana can be installed as a seperate download, or as an Eclipse plugin. For convenience we will download the whole application.
Workspace
When it starts up, Aptana will ask you what folder you want to use as a workspace. The default is not very good, as its name contains spaces:
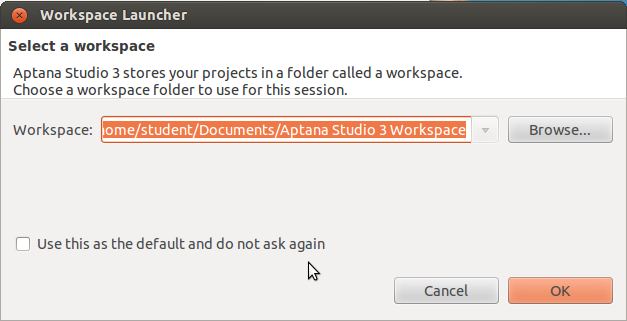
Instead use ~/workspace, the standard Eclipse workspace path. You can tell
Aptana to remember this workspace if you like.

Harmless libjpeg Error
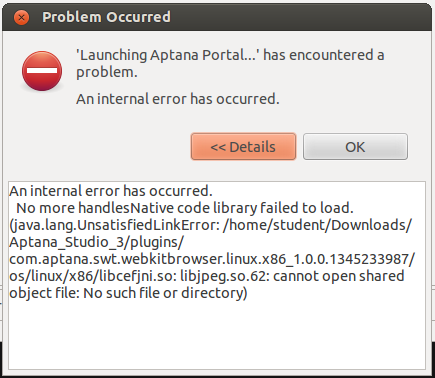
The first time you start Apatana Studio, you will get a frightening-looking error message, complaining that libjpeg.62.so is missing. This error is actually quite harmless - it is caused by Aptana trying to display it’s one-time splash screen after a new install. To display the splash screen requires a JPEG graphic handling library that we have not installed.
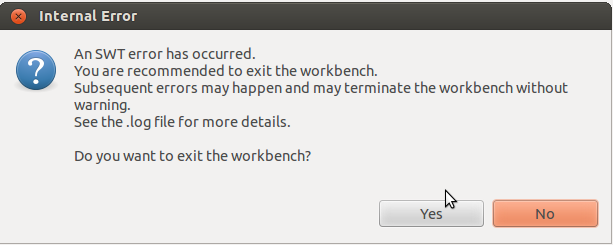
Click OK, and Eclipse will ask if you want to exit. Say yes, wait for Eclipse to exit, then launch it again. You will only see this error message the first time; thereafter, launch will be error-free.
This bug can be avoided entirely by installing libjpeg62:
$ sudo apt-get install libjpeg62
However this is not strictly necessary, as the bug does not damage anything, and appears only the first time a new Apatana installation is run.
Installing Eclipse Plugins
Each Eclipse plugin has an Update Site URL, from which it can be installed.
To install a plugin in Eclipse, choose Install New Software... from the
Help menu. Click the Add... button to add a new plugin repository. Put
the plugin’s Update Site URL in the Location: field.
Once you have added the plugin repository, check the box of the plugin you want
to install. Click Next >, then click thru until it is installed. Normally
Eclipse will want to restart itself after a new plugin has been installed.
Vwrapper
Vrapper is an Eclipse plugin providing VI-keys support. Only install this plugin if you are certain you want it.
Update site:
http://vrapper.sourceforge.net/update-site/stable
Python Perspective
Eclipse refers to collections of windows (views in Eclipse terminology) and their arrangement on screen as a perspective. There is a Python perspective available, pre-configured with the views one typically wants while working on Python code.
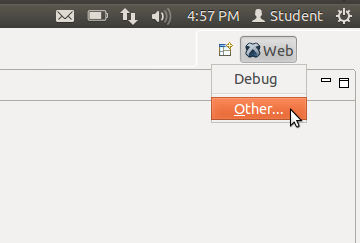
You can select the Python perspective by going to the perspective menu - it is in the upper right corner of the window, and looks like a grid with a plus sign. Click on it, select “Other...”, and choose “PyDev Perspective” from the ensuing dialog.
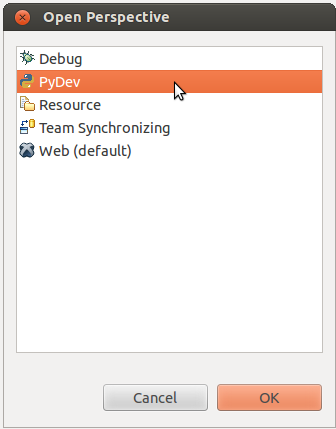
You will now be in the Python perspective.
Working with Virtual Environments
Unfortunately, Aptana is not aware of virtual environments by default. This can be worked around by manually configuring Aptana to use the Python interpreter from the virtual environment. We will configure the interpreter in the course of starting a new project below.
Starting a New Project
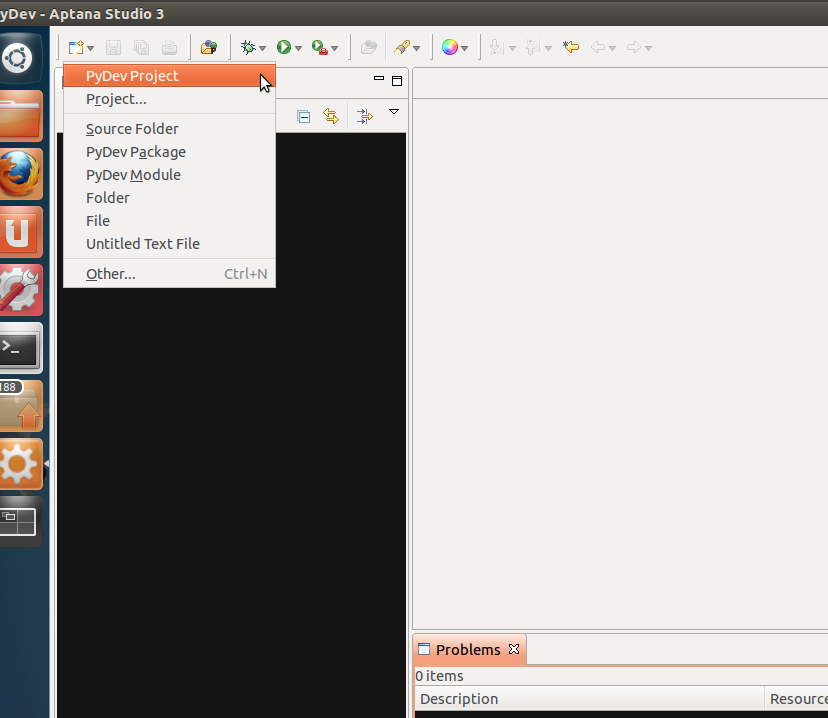
Start a new project by clicking on the new project menu - it looks like a window with a plus sign - in the upper left corner of the window. Click on the new project menu, and select “PyDev Project”.
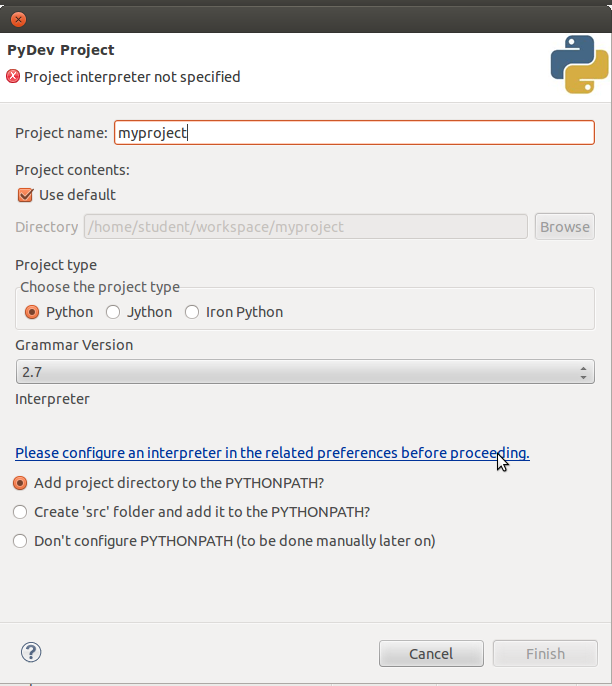
A new project dialog will appear. Fill in the name you want for your project, then click on the blue “Please configure an interpreter” link.
You will be taken to Eclipse’s Python interpreter settings page.
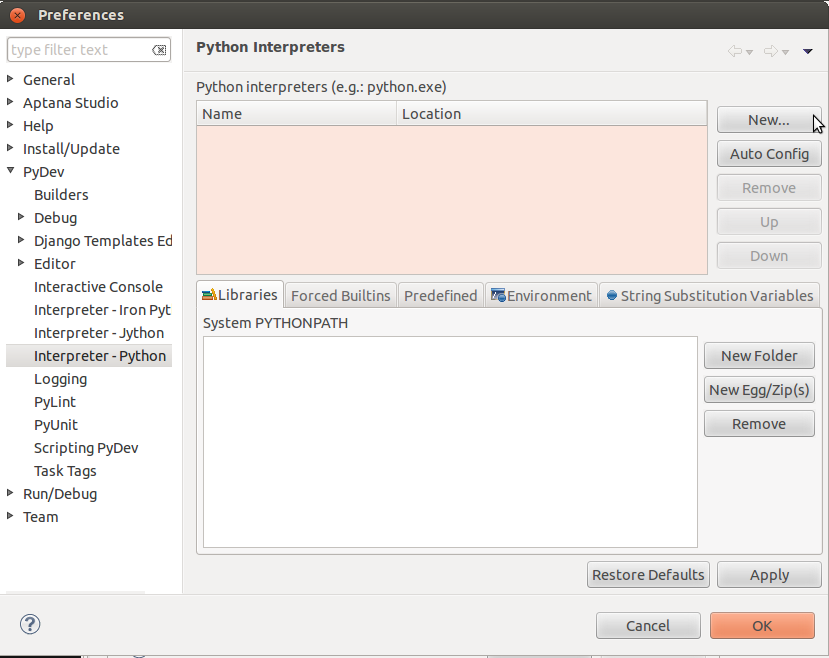
Click the “New...” button. A select file dialog will open; go to your home folder. Once there, right-click on the file list, and choose “Show Hidden Files” from the context menu.
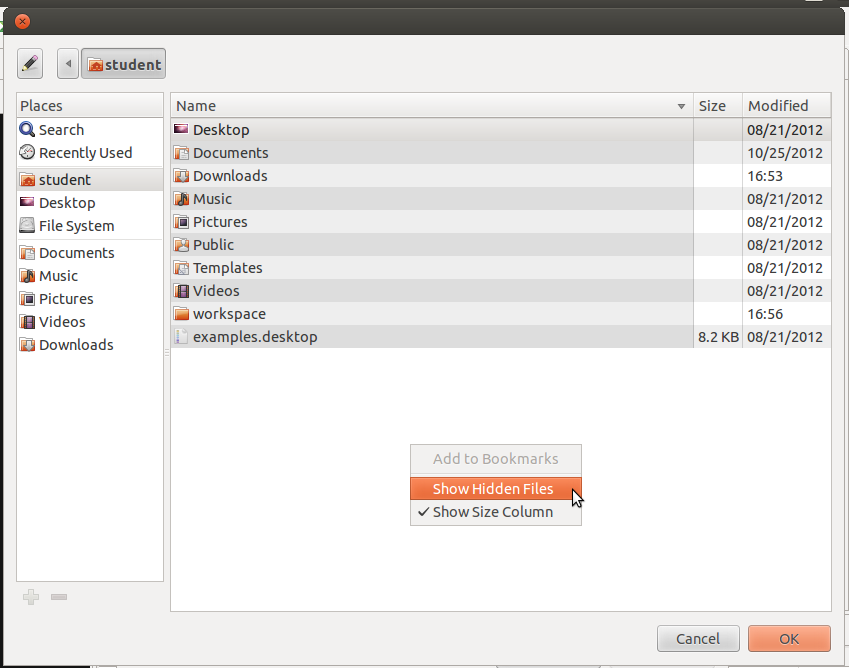
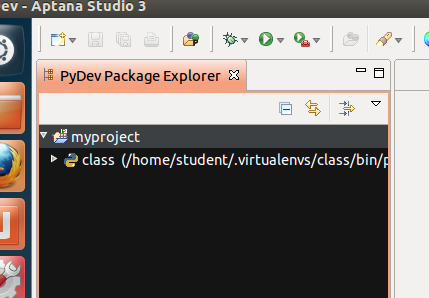
Click thru to select the python executable at ~/.virtualenvs/class/bin/python.

Click OK, and you will return to the Select Interpreter dialog, which will look like this:
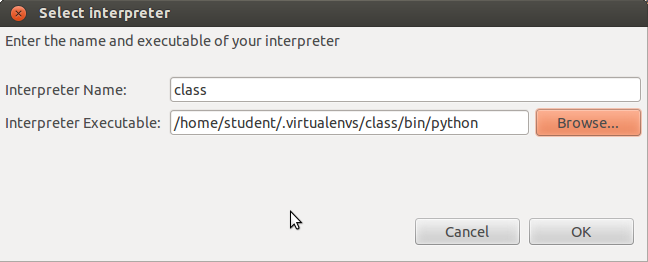
Click “OK”, and you will return to the PyDev Project dialog. From the “Interpreter” popup menu, choose “class”, the virtualenv we just configured.
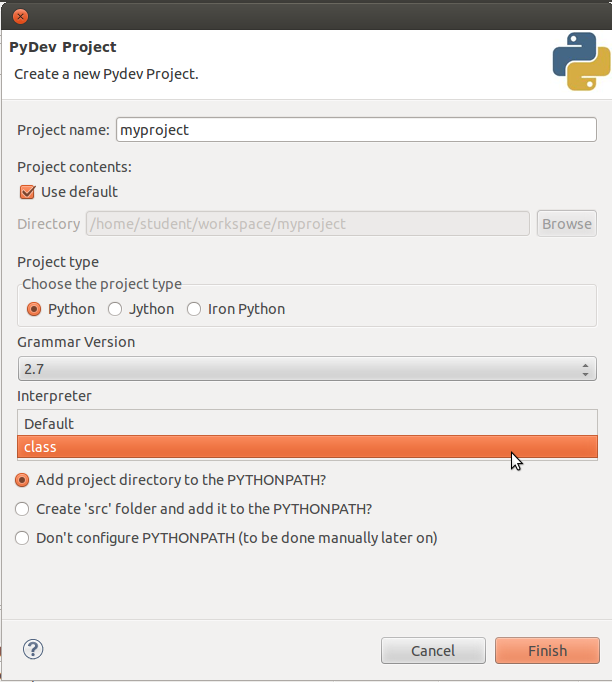
Click “Finish” and you will have successfully created a new project! Your new project will now be visible in the Project Explorer view.